2. 基本設定
2.1. 初期設定
初期状態から利用開始する設定例です。
必要に応じて設定モードを切り替えます。
初期ユーザー登録モードにログイン後、管理者レベルのユーザーアカウントを作成し、作成したユーザーアカウントで再ログインする必要があります。
詳しい手順は『取扱説明書』をご参照ください。

2.1.1. 設定
2.1.1.1. 本装置の設定
Router login: admin
Password: admin

NEC IX-R Series IX-R2520 Software, Version 1.2.9, RELEASE SOFTWARE
Compiled Fri 23 Aug 2024 11:49:28 AM JST
Copyright (c) NEC Corporation 2023-2024. All rights reserved.

Router(init)# default-console command-line
% You must RELOAD the router for this configuration to take effect.
Router(init)# reload
Notice: The router will be RESTARTED.
Are you sure you want to restart the router? (Yes or [No]): yes

  <省略>

Router login: admin
Password: admin

NEC IX-R Series IX-R2520 Software, Version 1.2.9, RELEASE SOFTWARE
Compiled Fri 23 Aug 2024 11:49:28 AM JST
Copyright (c) NEC Corporation 2023-2024. All rights reserved.

Router(init)# username test-user password plain test-pass administrator
% Password strength estimation: score 1(poor).
% User 'test-user' has been added.
Router(init)# exit


NEC IX-R Series IX-R2520 Software, Version 1.2.9, RELEASE SOFTWARE

Router login: test-user
Password: test-pass
Last login: Fri Sep 27 13:26:47 JST 2024 on ttyS0

NEC IX-R Series IX-R2520 Software, Version 1.2.9, RELEASE SOFTWARE
Compiled Fri 23 Aug 2024 11:49:28 AM JST
Copyright (c) NEC Corporation 2023-2024. All rights reserved.
2.1.2. 解説
Router login: admin
Password: admin
初回ログイン専用のユーザー名 : admin、パスワード : adminでログインします。
default-console command-line
設定モード「コマンドライン」に設定します。
工場出荷時の初期状態では、それぞれ以下の設定モードになっています。
IX-R2520 : 設定モード「Webコンソール」
IX-R2530 : 設定モード「コマンドライン」
reload
装置を再起動します。
username test-user password plain test-pass administrator
ユーザーアカウント(ユーザー名 :
test-user 、パスワード : test-pass )をアドミニストレーター権限(管理者レベル)で設定します。任意のユーザー名とパスワードを設定してください。
exit
初期ユーザー登録モードからログアウトします。
Router login: test-user
Password: test-pass
任意に設定したユーザー名とパスワードでログインします。
2.2. ユーザーアカウントの設定
ユーザーアカウントの設定例です。
2.2.1. 設定
2.2.1.1. 本装置の設定
Router(config)# username test-user2 password plain test-pass2 operator
% Password strength estimation: score score 2(normal).
% User 'test-user2' has been added.
2.2.2. 解説
username test-user2 password plain test-pass2 operator
ユーザーアカウント(ユーザー名 :
test-user2 、パスワード : test-pass2 )を オペレーター 権限で設定します。任意のユーザー名とパスワードを設定してください。
2.3. ホスト名の設定
ホスト名の設定例です。
2.3.1. 設定
2.3.1.1. 本装置の設定
Router# configure
Router(config)# hostname IX-R2520
IX-R2520(config)#
2.3.2. 解説
hostname IX-R2520
ホスト名 : IX-R2520 を設定します。
2.4. ログ取得設定
ログ取得の設定例です。
2.4.1. 設定
2.4.1.1. 本装置の設定
Router# configure
Router(config)# syslog enable
Router(config)# syslog function all warn
2.4.2. 解説
syslog enable
syslog function all warn
ログ取得(取得する機能 : all 、取得レベル : warn )の設定です。
2.5. NetMeister設定
NetMeisterクライアント機能を利用する場合の設定例です。
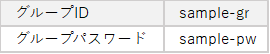
グループIDとグループパスワードは、以下の内容でNetMeisterに登録済みとします。
2.5.1. 設定
2.5.1.1. 本装置の設定
Router# configure
Router(config)# hostname IX-R2520
IX-R2520(config)# nm ip enable
IX-R2520(config)# nm account sample-gr password plain sample-pw
IX-R2520(config)# nm sitename tokyo
2.5.2. 解説
hostname IX-R2520
ホスト名 :
IX-R2520 を設定します。ホスト名は、NetMeister上で装置名として表示されます。
NetMeisterダイナミックDNSサービスのドメインの一部となります。
nm ip enable
NetMeisterクライアント機能を有効化します。
nm account sample-gr password plain sample-pw
NetMeisterで登録したグループID : sample-gr とパスワード : sample-pw を設定します。
nm sitename tokyo
NetMeisterで登録する拠点ID :
tokyo を設定します。本設定を省略した場合、ホスト名が拠点IDとして設定されます。
2.6. DHCPサーバーを使用する
DHCPサーバーの設定例です。

2.6.1. 設定
2.6.1.1. 本装置の設定
Router# configure
Router(config)# ip dhcp profile dhcp-prof
Router(config-dhcp-dhcp-prof)# dns-server 192.168.0.254
Router(config-dhcp-dhcp-prof)# exit
Router(config)# interface GigaEthernet2.0
Router(config-GigaEthernet2.0)# ip address 192.168.0.254/24
Router(config-GigaEthernet2.0)# ip dhcp enable
Router(config-GigaEthernet2.0)# ip dhcp binding dhcp-prof
Router(config-GigaEthernet2.0)# proxy-dns ip enable
Router(config-GigaEthernet2.0)# no shutdown
Router(config-GigaEthernet2.0)# exit
Router(config)#
2.6.2. 解説
ip dhcp profile dhcp-prof
  dns-server 192.168.0.254
ip dhcp profileコマンドでDHCPコンフィグモードに移行します。
またDHCPサーバー機能のプロファイル名を
dhcp-prof と定義します。DCHPプロファイル :
dhcp-prof にDNSサーバーのIPアドレス : 192.168.0.254 を登録します。プロキシDNS機能を使用するため、端末に通知するDNSサーバーのIPアドレスは、
GE2.0 のIPアドレスとなります。interface GigaEthernet2.0
ip dhcp enable
ip dhcp binding dhcp-prof
proxy-dns ip enable
DHCP機能の有効化とDHCPプロファイルの関連付けを行います。
プロキシDNS機能を使用する場合、プロキシDNS機能の有効化も行います。
interface GigaEthernet2.0
  ip address 192.168.0.254/24
  no shutdown
IPアドレスの設定とインタフェース有効化設定です。
2.7. SSHサーバーを使用する
SSHサーバーの設定例です。

2.7.1. 設定
2.7.1.1. 本装置の設定
Router# configure
Router(config)# ip access-list ssh-list permit ip src 192.168.0.0/24 dest 192.168.0.254/32
Router(config)# ssh-server ip access-list ssh-list
Router(config)# interface GigaEthernet2.0
Router(config-GigaEthernet2.0)# ip address 192.168.0.254/24
Router(config-GigaEthernet2.0)# ssh-server ip enable
Router(config-GigaEthernet2.0)# no shutdown
Router(config-GigaEthernet2.0)# exit
Router(config)#
2.7.2. 解説
ip access-list ssh-list permit ip src 192.168.0.0/24 dest 192.168.0.254/32
ssh-server ip access-list ssh-list
SSH接続用のアクセス制限設定です。
interface GigaEthernet2.0
  ssh-server ip enable
SSHサーバー機能を有効化します。
GE2.0 で受信した場合のみSSH接続可能となります。2.8. Webコンソールを使用する
Webコンソールを有効化する設定例です。

2.8.1. 設定
2.8.1.1. 本装置の設定
Router# configure
Router(config)# ip access-list http-list permit ip src 192.168.0.0/24 dest 192.168.0.254/32
Router(config)# http-server ip access-list http-list
Router(config)# interface GigaEthernet2.0
Router(config-GigaEthernet2.0)# ip address 192.168.0.254/24
Router(config-GigaEthernet2.0)# http-server ip enable
Router(config-GigaEthernet2.0)# no shutdown
Router(config-GigaEthernet2.0)# exit
Router(config)#
2.8.2. 解説
ip access-list http-list permit ip src 192.168.0.0/24 dest 192.168.0.254/32
http-server ip access-list http-list
Webコンソール接続用のアクセス制限設定です。
interface GigaEthernet2.0
  http-server ip enable
Webコンソール機能(HTTPサーバー機能)を有効化します。
GE2.0 で受信した場合のみWebコンソール接続可能となります。